
 Don’t worry, this blog is not going to turn all DIY and crafty. I only know how to make a few things, so there wouldn’t be very many posts!
However, if you’ve read Leaving the Beach, you might recall that the main character, Erin Reardon, wears a homemade denim skirt in three key scenes. In the book, the skirt is given to her by a college roommate, but when I was in college, I was taught how to make denim skirts by a woman on my dorm floor. I can’t recall the woman’s name now, but I’ll always been grateful to her.
Because these skirts are so useful! They can transform a worn out pair of old jeans into the first thing you pack for a beach getaway. Or, if you own a pair of nicer, designer jeans that don’t fit right or aren’t your style any more, you can convert them into a slightly dressy skirt. Anyone who knows me well knows I wear these things just about everywhere. Back in the early 2000’s, I even had a little home-based business making them for local women and selling them at craft fairs. Therefore, I have quite a collection: longer skirts for winter (they’re fun paired with colorful socks or tights); short and medium-length ones that work well for running errands and eating in casual restaurants; still shorter, more faded ones to wear to barbecues, concerts, and bonfires.
So if you’d like to make one (or several) denim skirts for yourself, just follow these steps and you can be wearing one tomorrow.
**Please note these directions are for making a skirt that’s knee-length or shorter. Making a long one is a bit more complicated because you’ll need extra fabric, so feel free to message me if you’d like to learn how to make a long one.
Here are the supplies you’ll need:
* A pair of jeans that you like the top part of, but are willing to sacrifice in the event that something goes terribly wrong. (Yes, it can happen, but let’s not think about that possibility.) The most important thing about these jeans is that they should fit fairly comfortably through the waist and hips. It’s OK if they’re a little too tight, because turning them into a skirt usually loosens things up, but make sure you can zip and button them. And, of course, it they’re way too big, the skirt will fall right off! If you don’t own an appropriate pair of jeans, I recommend shopping in your local thrift shop or on ebay. One trick I’ve learned is that you can get very high quality used jeans on ebay, for a fraction of the original selling price. Take a look!
* A seam ripper (Most sewing stores sell seam rippers for about a dollar, and it’s really hard to rip out all your seams with scissors.)
* Sharp scissors and pinking shears, if possible
* Thread (Any color. You may want to match the color of your jeans, or go with something totally different.)
* Needle and thread, or sewing machine. (These directions are for use with a sewing machine, but if you don’t have one, you can do your stitching by hand. All the skirts I made in college were done by hand, and I think that makes them look particularly funky and unique. These days, though, I use a sewing machine because it’s much faster.)
*pins, preferably plain ones without colorful plastic tops. (I find the ones with the plastic tops can interfere with the sewing machine.)
OK, let’s go!
1. Try on the jeans, look in the mirror, and use some sort of pen with washable ink to mark the place where you want the bottom of the skirt to be. Mark both legs, by the way. Then take off the jeans and cut them into shorts, making sure to cut at least an inch below your marks. Later on, you can cut the skirt to the perfect length. And save those bottoms you cut off. You will need them later. Your pants will now look something like this: 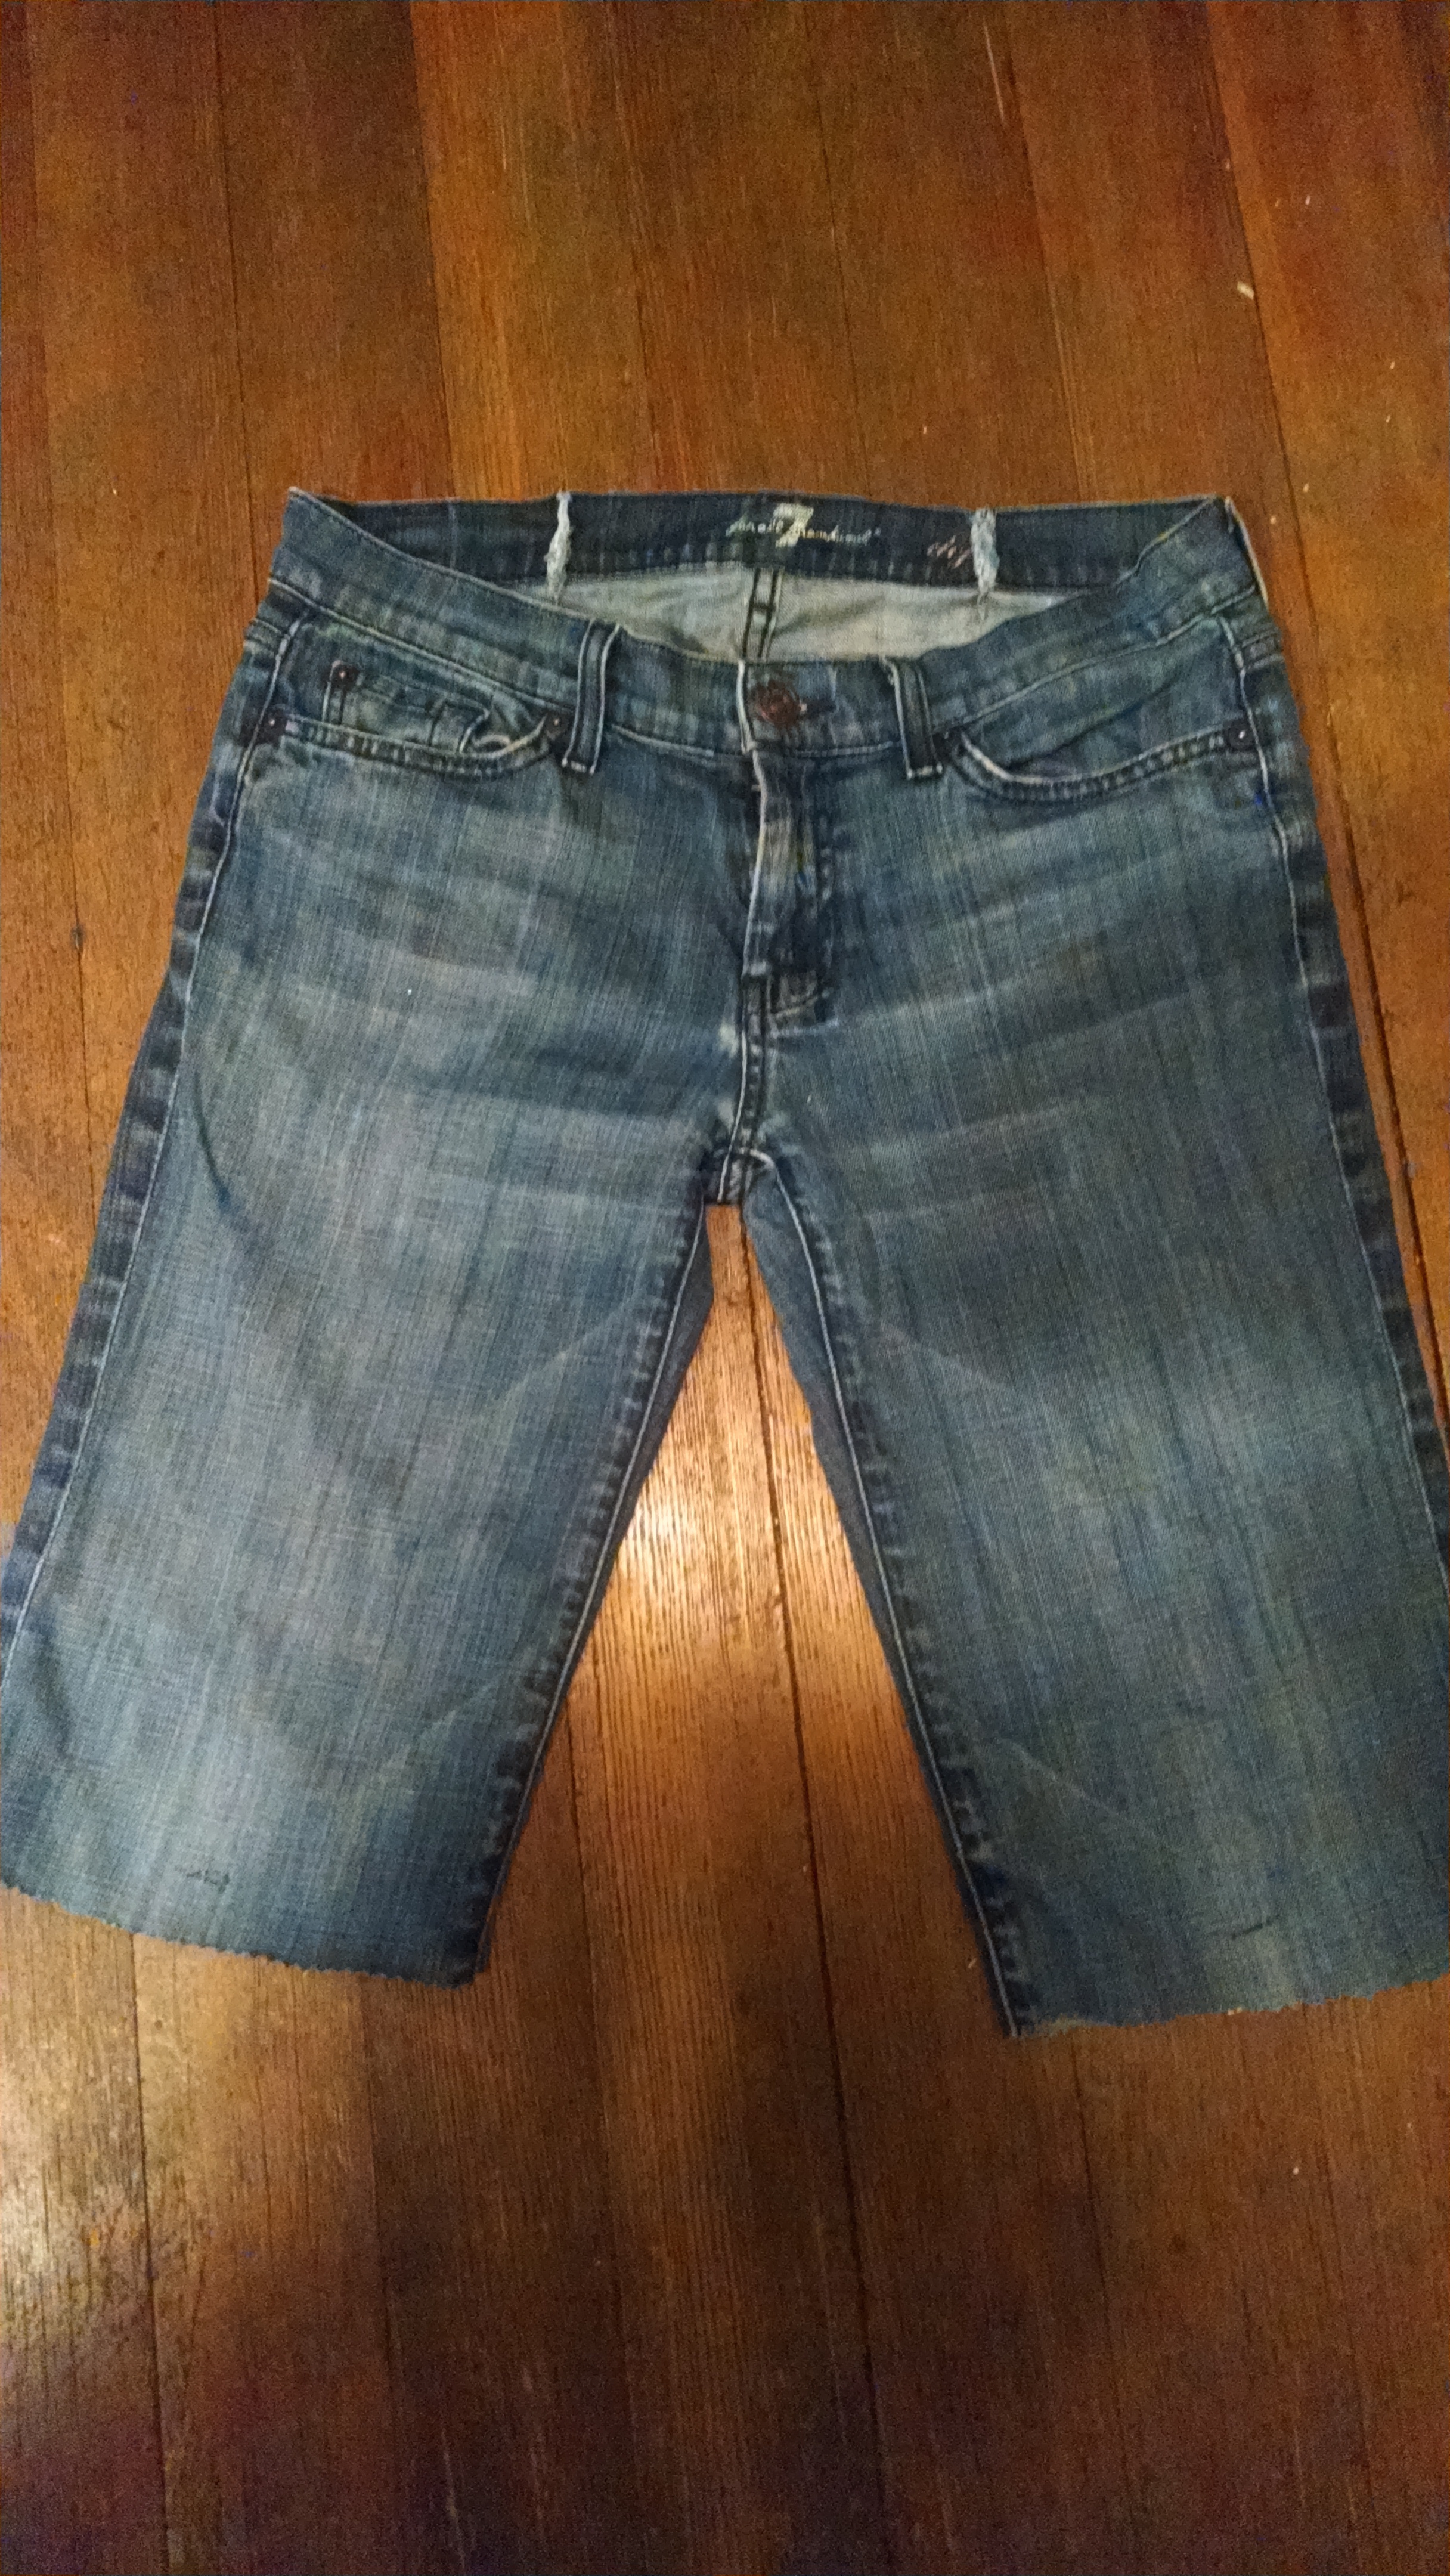
2. Rip out the entire inseam (or inseams). The inseam is the seam that starts at one inner leg opening, goes up the leg, across the crotch, and down the other leg to the bottom. Some jeans have more than one inseam, so ripping all that thread can be quite frustrating. My advice: take your time with the ripping. Remember when I mentioned how things can go wrong? This is the place where that’s most likely to happen, especially if you’re rushing. But if you should make a hole, don’t worry, because you can always add a patch later.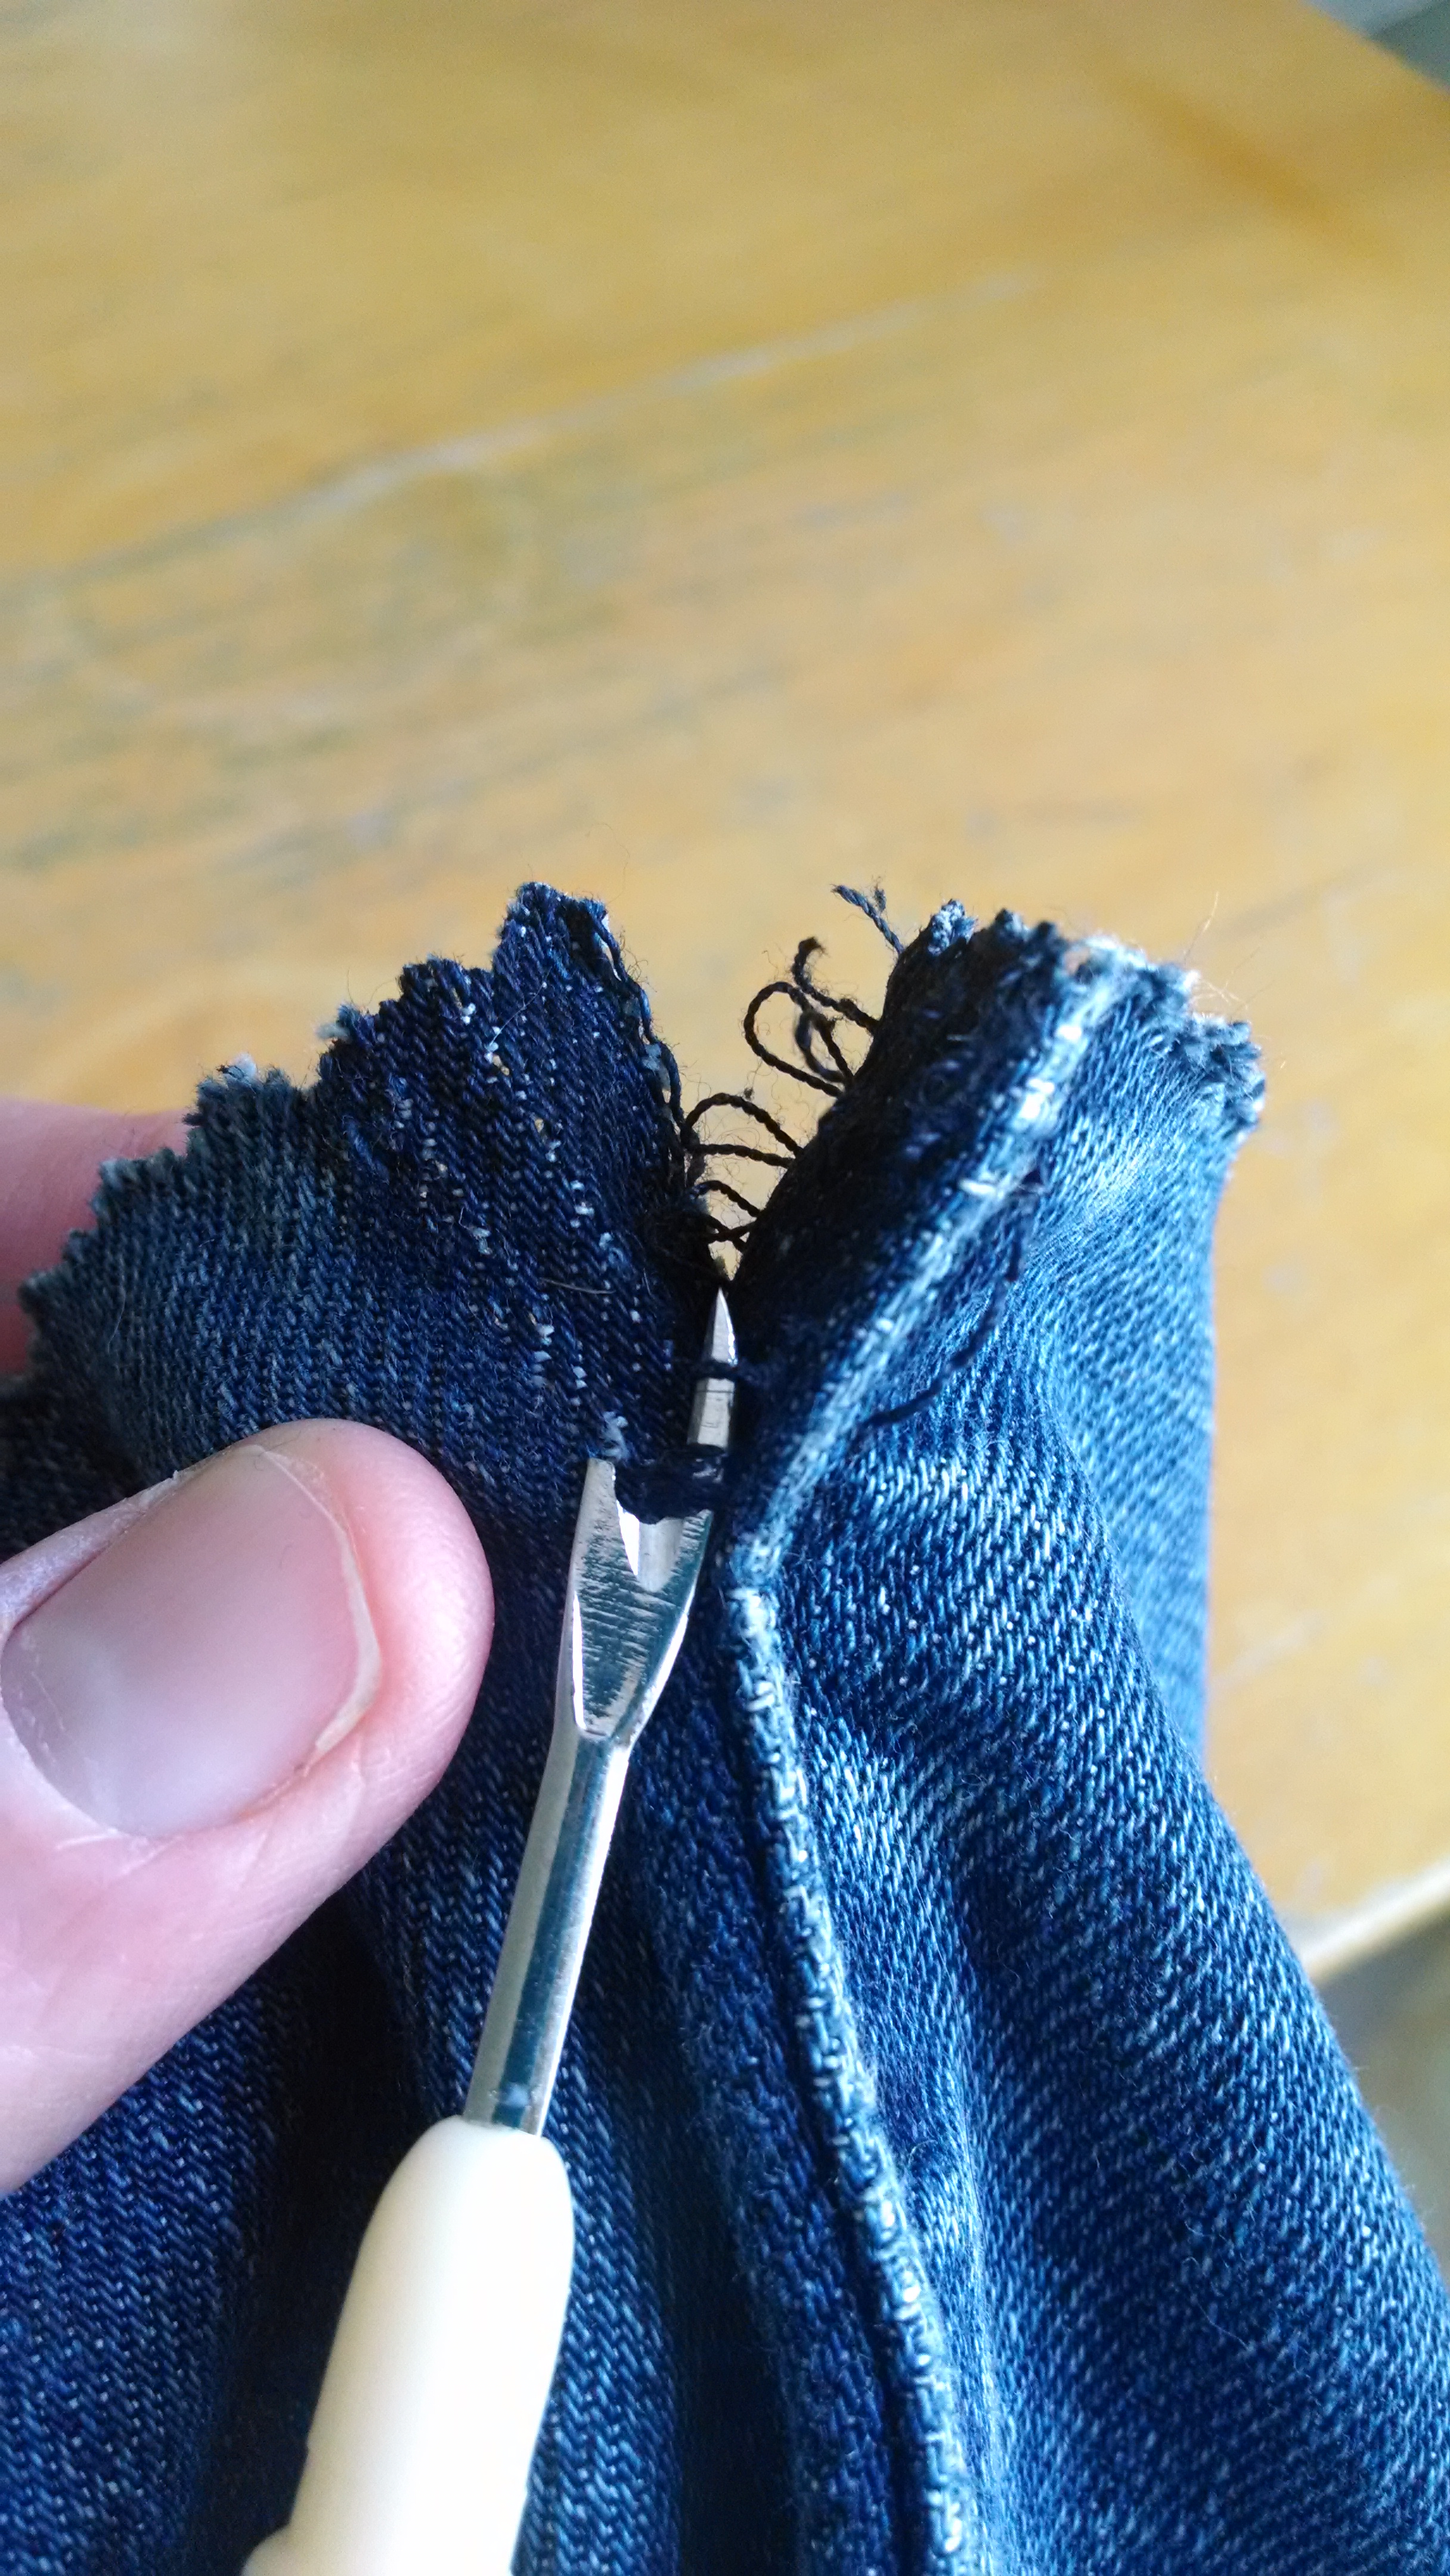
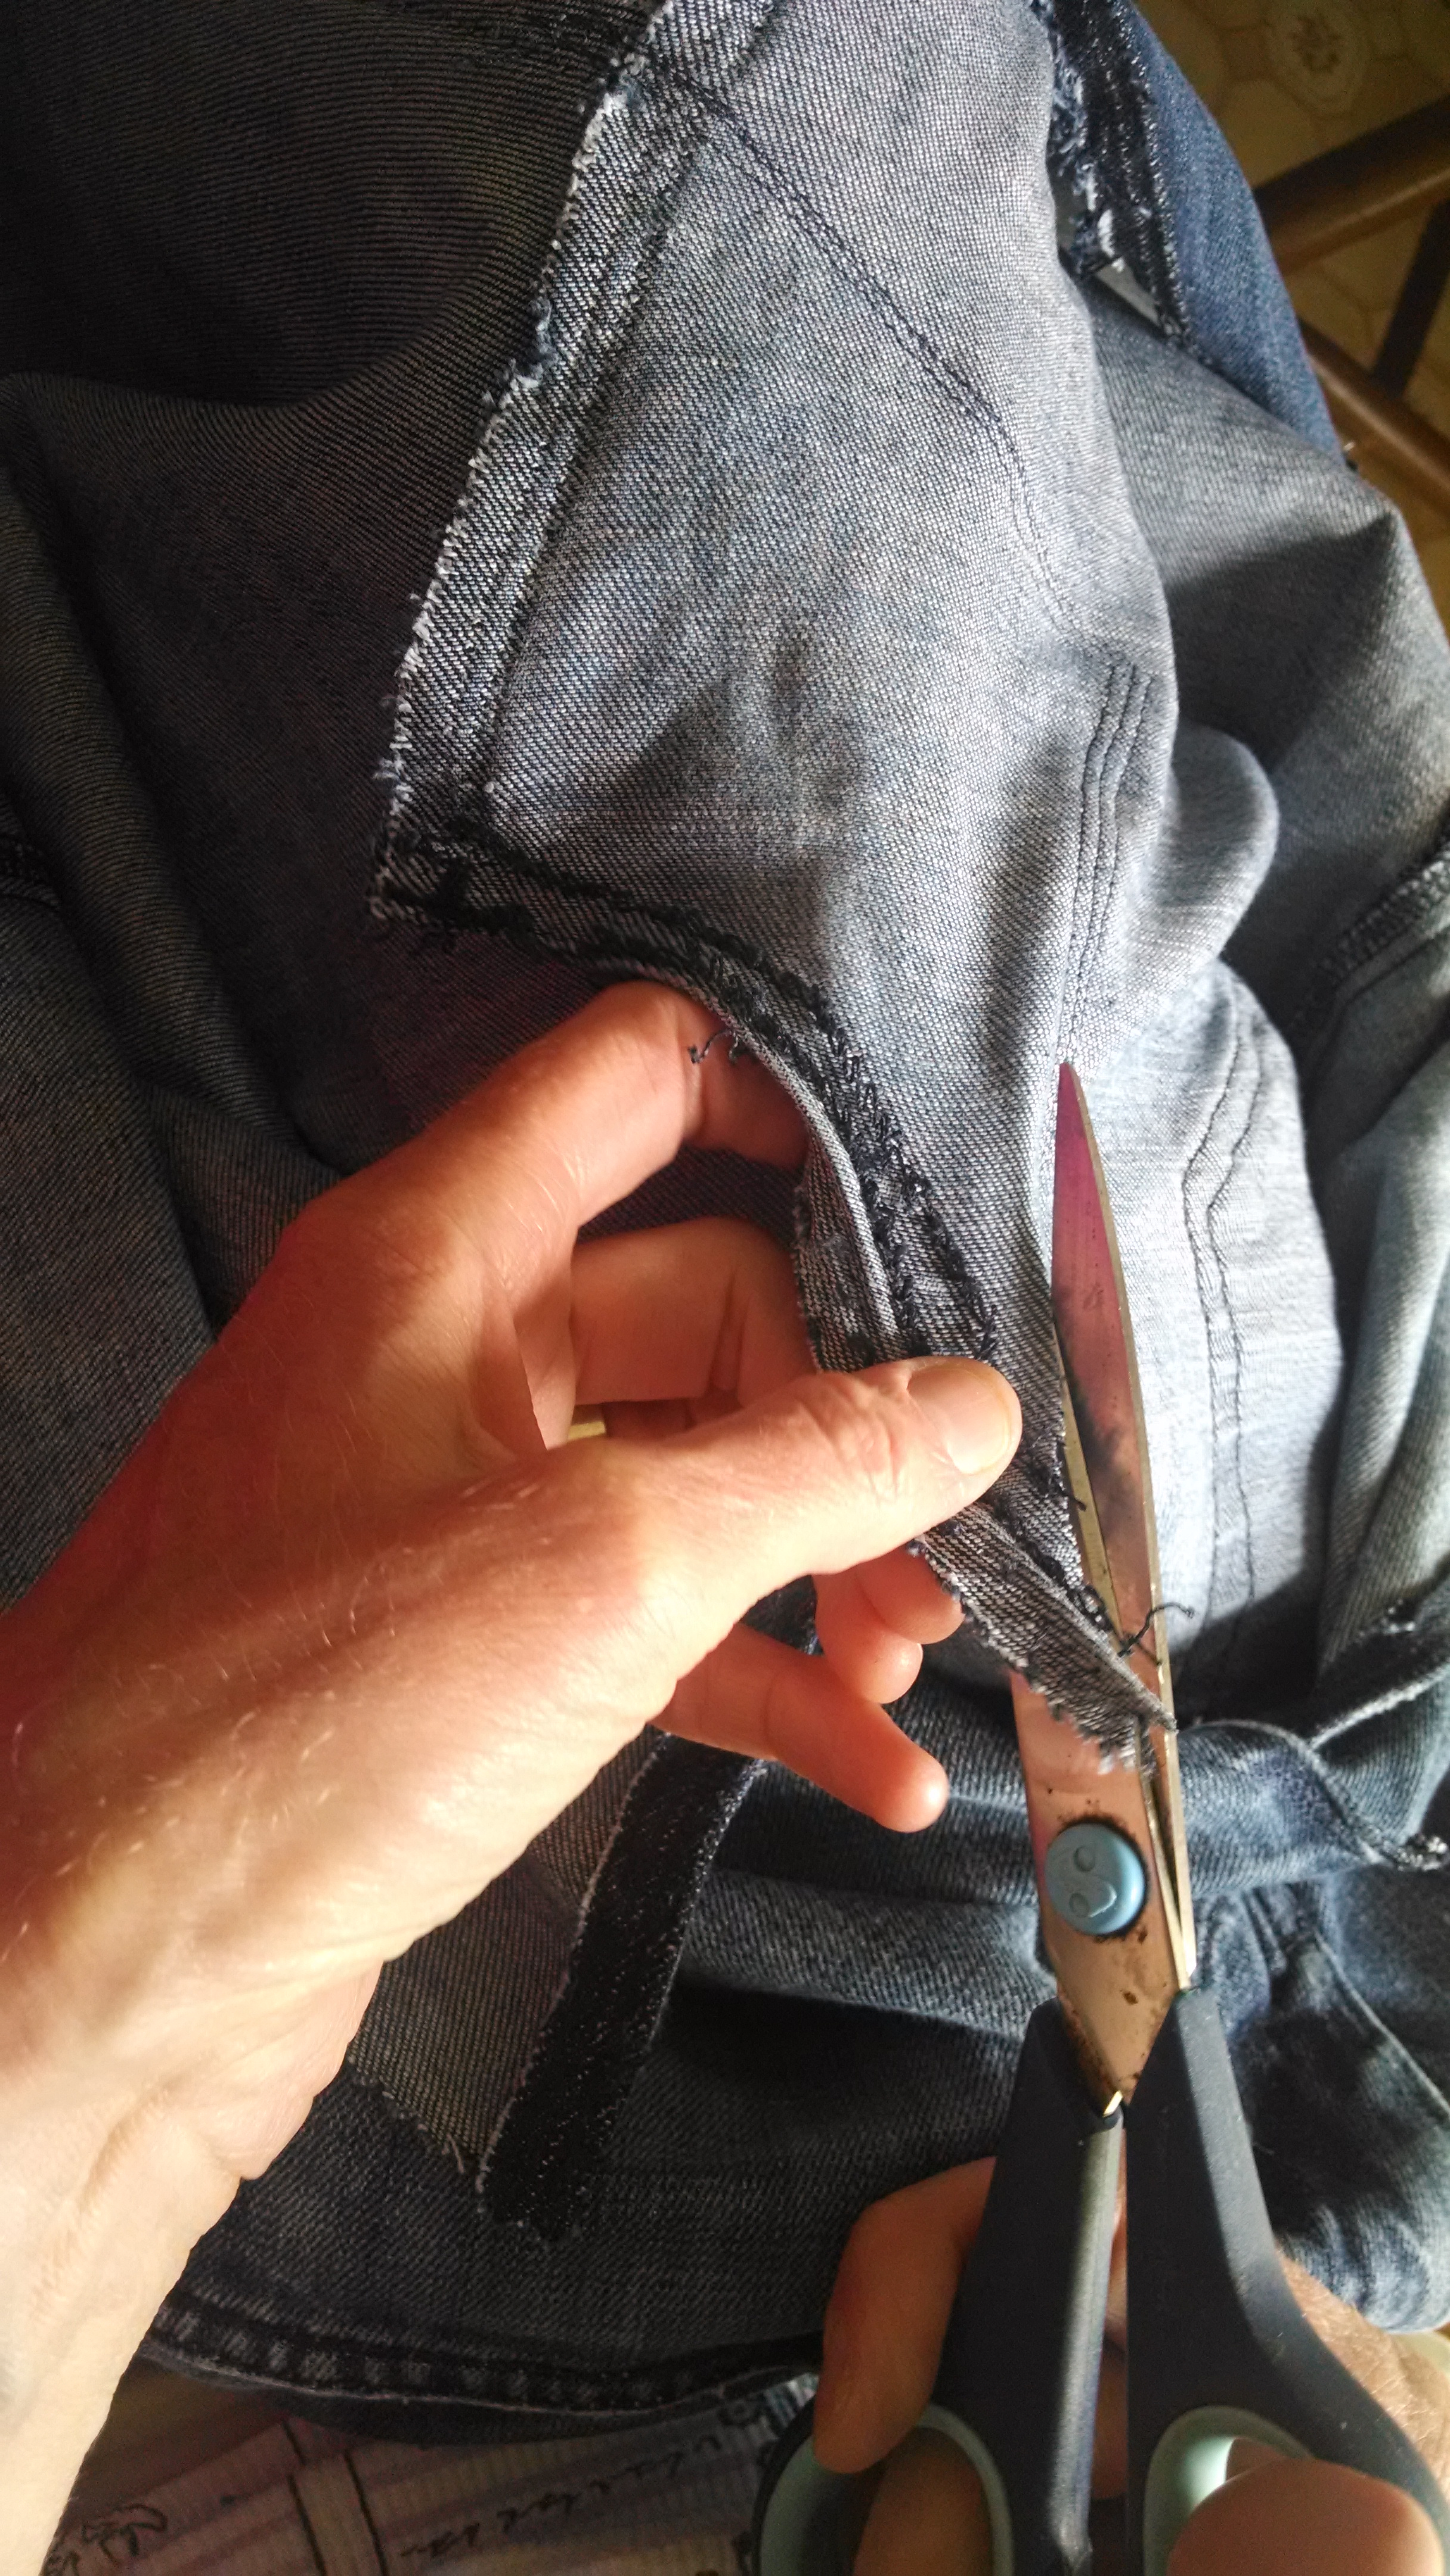
3. When you get to the place where the inseam meets the crotch seam, things can get a bit tricky, especially if the thread is the same color as the jeans. Don’t worry if you rip some of the crotch seam, because you’re going to be ripping that out anyway in the next step. But if you hit what really seems like an impasse, just stop and go to the bottom of the other leg and work your way up until you get to a situation like this:

Then, just be very patient, make sure you’re in good lighting, and use your seam ripper to carefully cut every stitch you can. Pulling on the fabric can help you see where the stitches are. Take your time, breathe, and eventually, you’ll have the entire inseam ripped. Then go along the seams you’ve ripped and pull away as much loose thread as you can. Some thread will come off in long strands, some will be in little pieces. And whatever you can’t get, just leave. The thread may eventually come off in the wash, or stick around and add more personality to your skirt. Here’s how your item should look now:

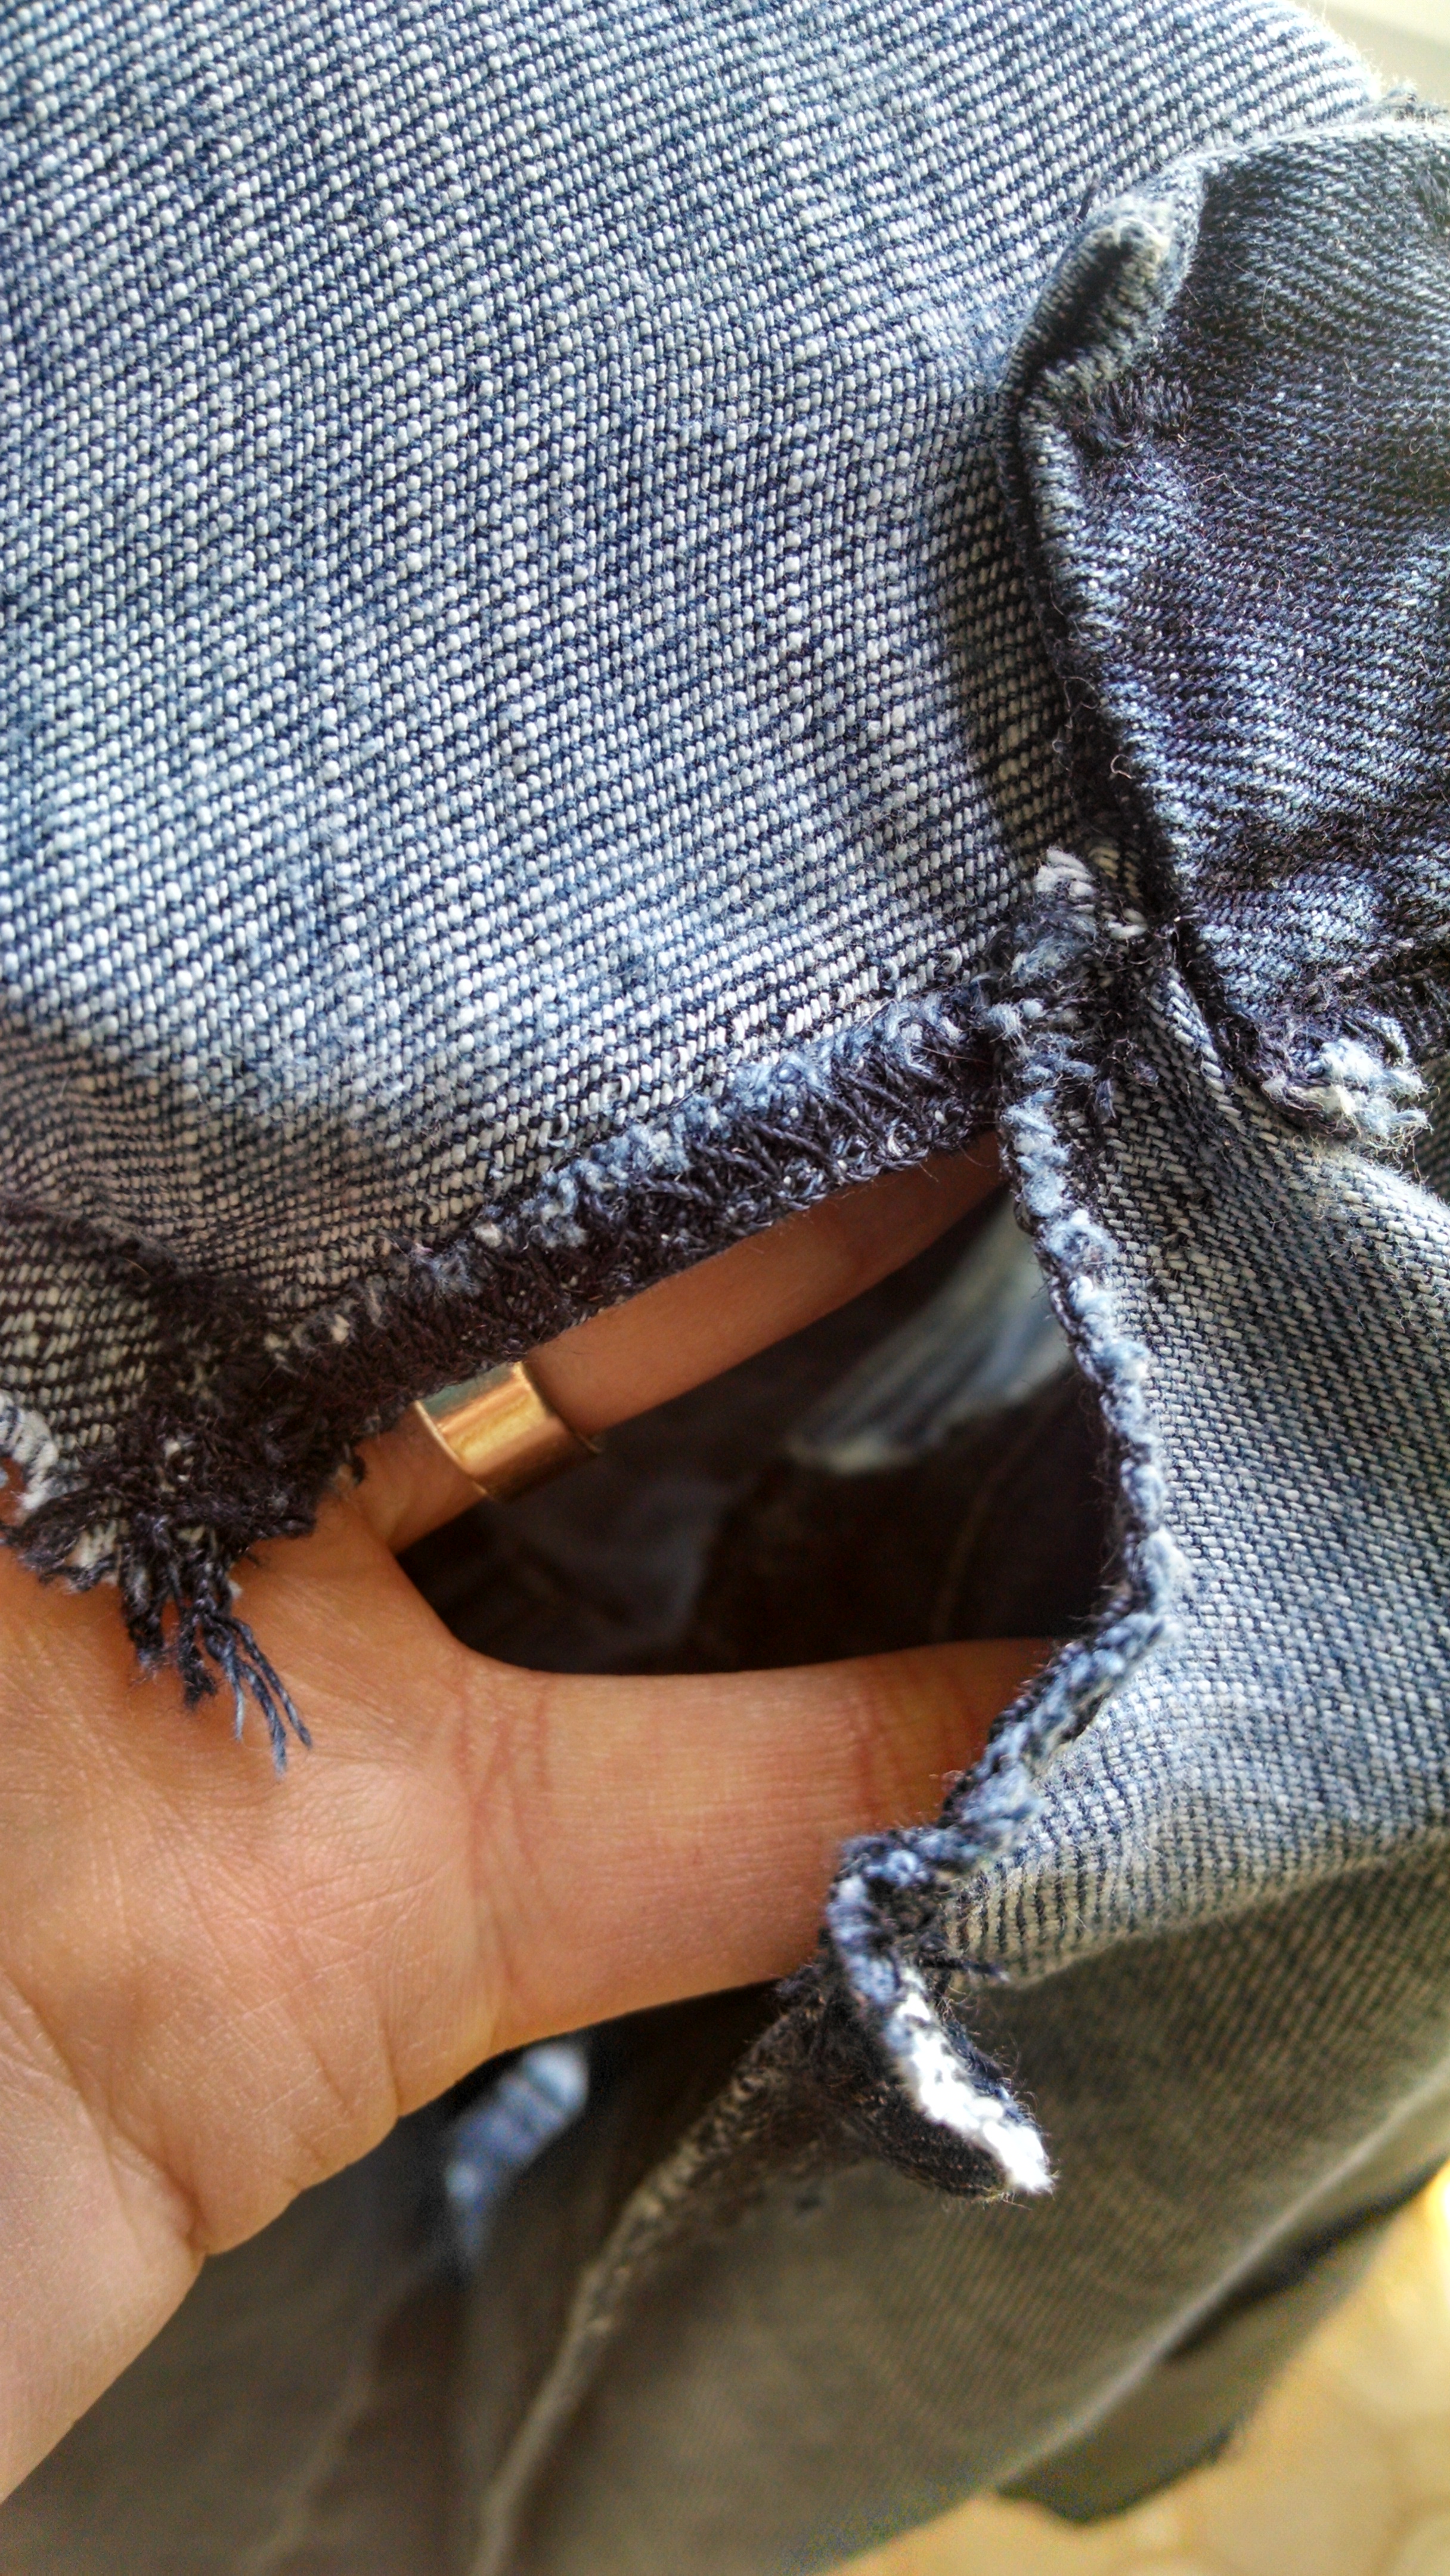
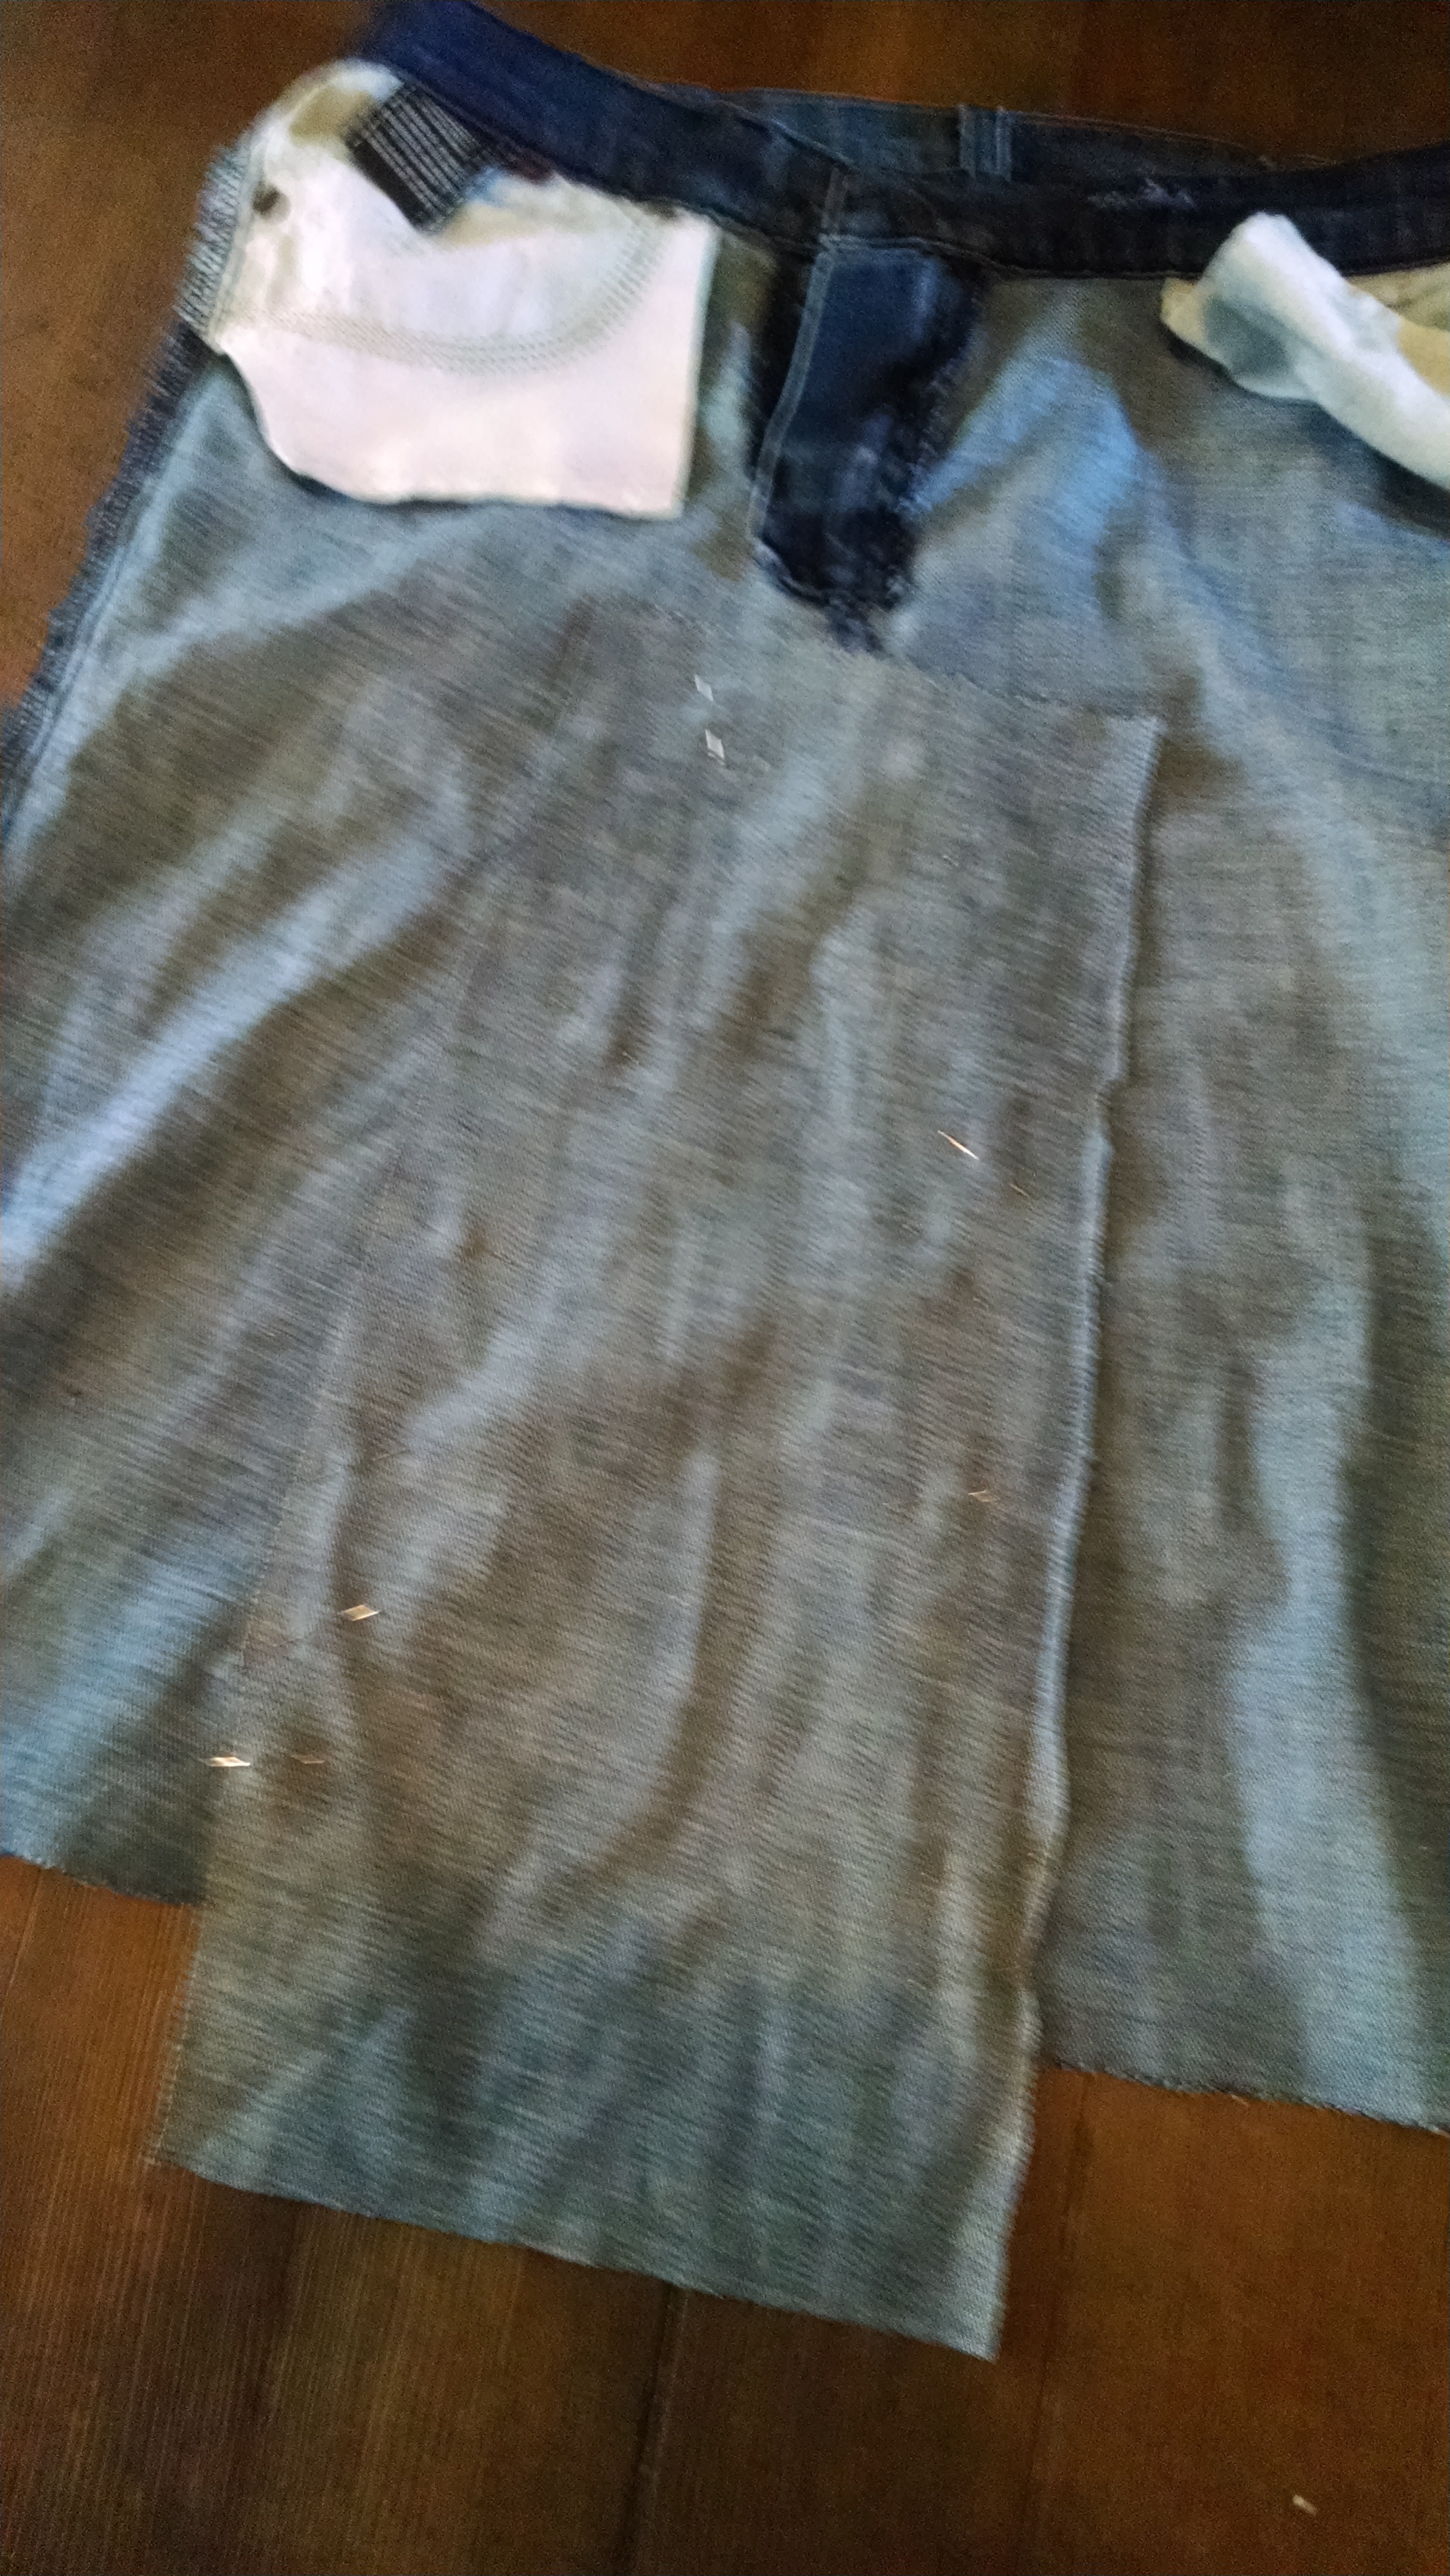
4. Now for the crotch seams. The front part is easiest. Start at the bottom and rip out everything until you hit the bottom of the zipper casing:
5. The back crotch seam is a bit trickier, as each pair of pants is made differently. If you hold the pants up by the waist and look at the back, you’ll see how the crotch seam now hangs awkwardly. You’re going to be opening this seam up partway, and then crossing the left part of the fabric over the right, and the goal is to not have too many lumps and bumps. You’ll want to rip out at least three inches of the back crotch seam, then experiment with pulling the left side over the right and seeing if it lies flat. If it’s not nice and flat, rip a bit more. On this particular skirt, I ripped out seven inches of the back crotch seam, then pulled the left over the right and pinned it down. I always use as many pins as possible, as that tends to help eliminate the lumps and bumps: 
6. Now pin the front down. In the front, you’ll be crossing the right side over the left and pinning it down. In this picture, it looks like there’s some light blue fabric in the open triangle area, but that’s just because I have the skirt lying on my knee! 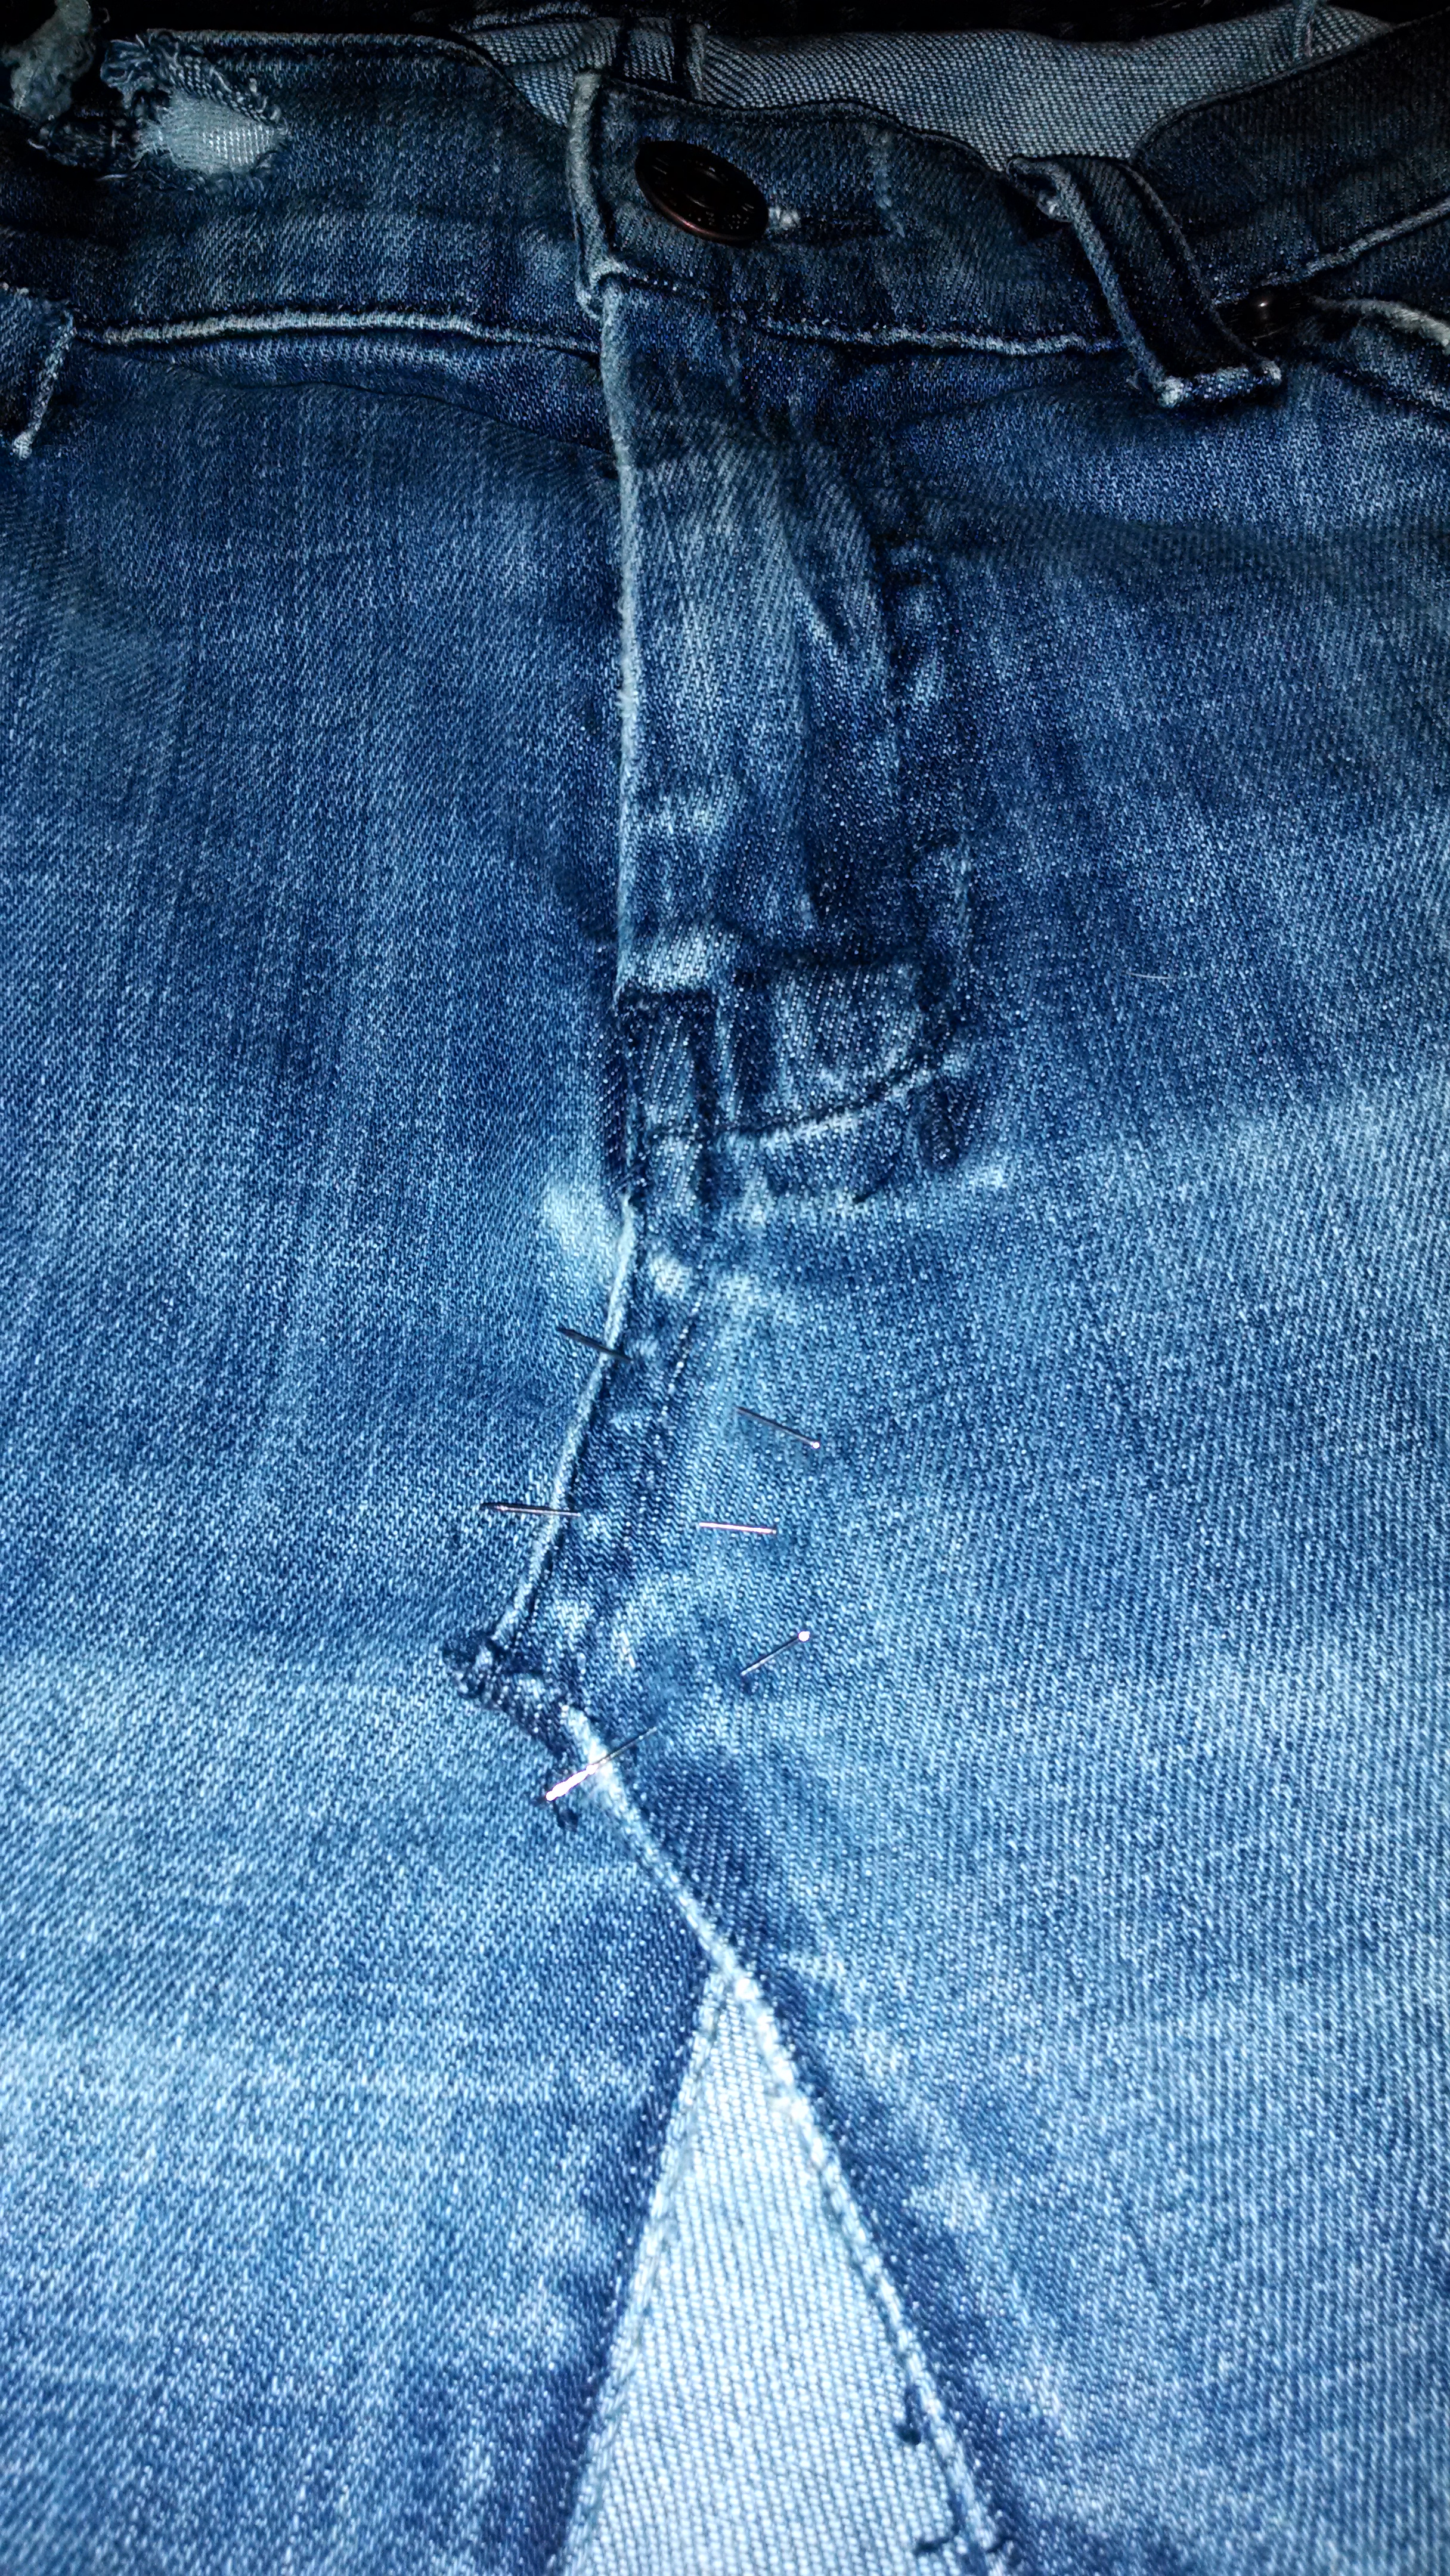
7. At this point, I recommend trying on your semi-skirt–very carefully because of those pins– and see if you like the fit. You’re going to be sewing next, so if anything about the fit doesn’t suit you, this is the time to take out the pins, rip out more of the back crotch seam if necessary, and re-pin.
8. Sew along your pinned seams, then remove pins. I usually sew each seam at least twice, for reinforcement; 
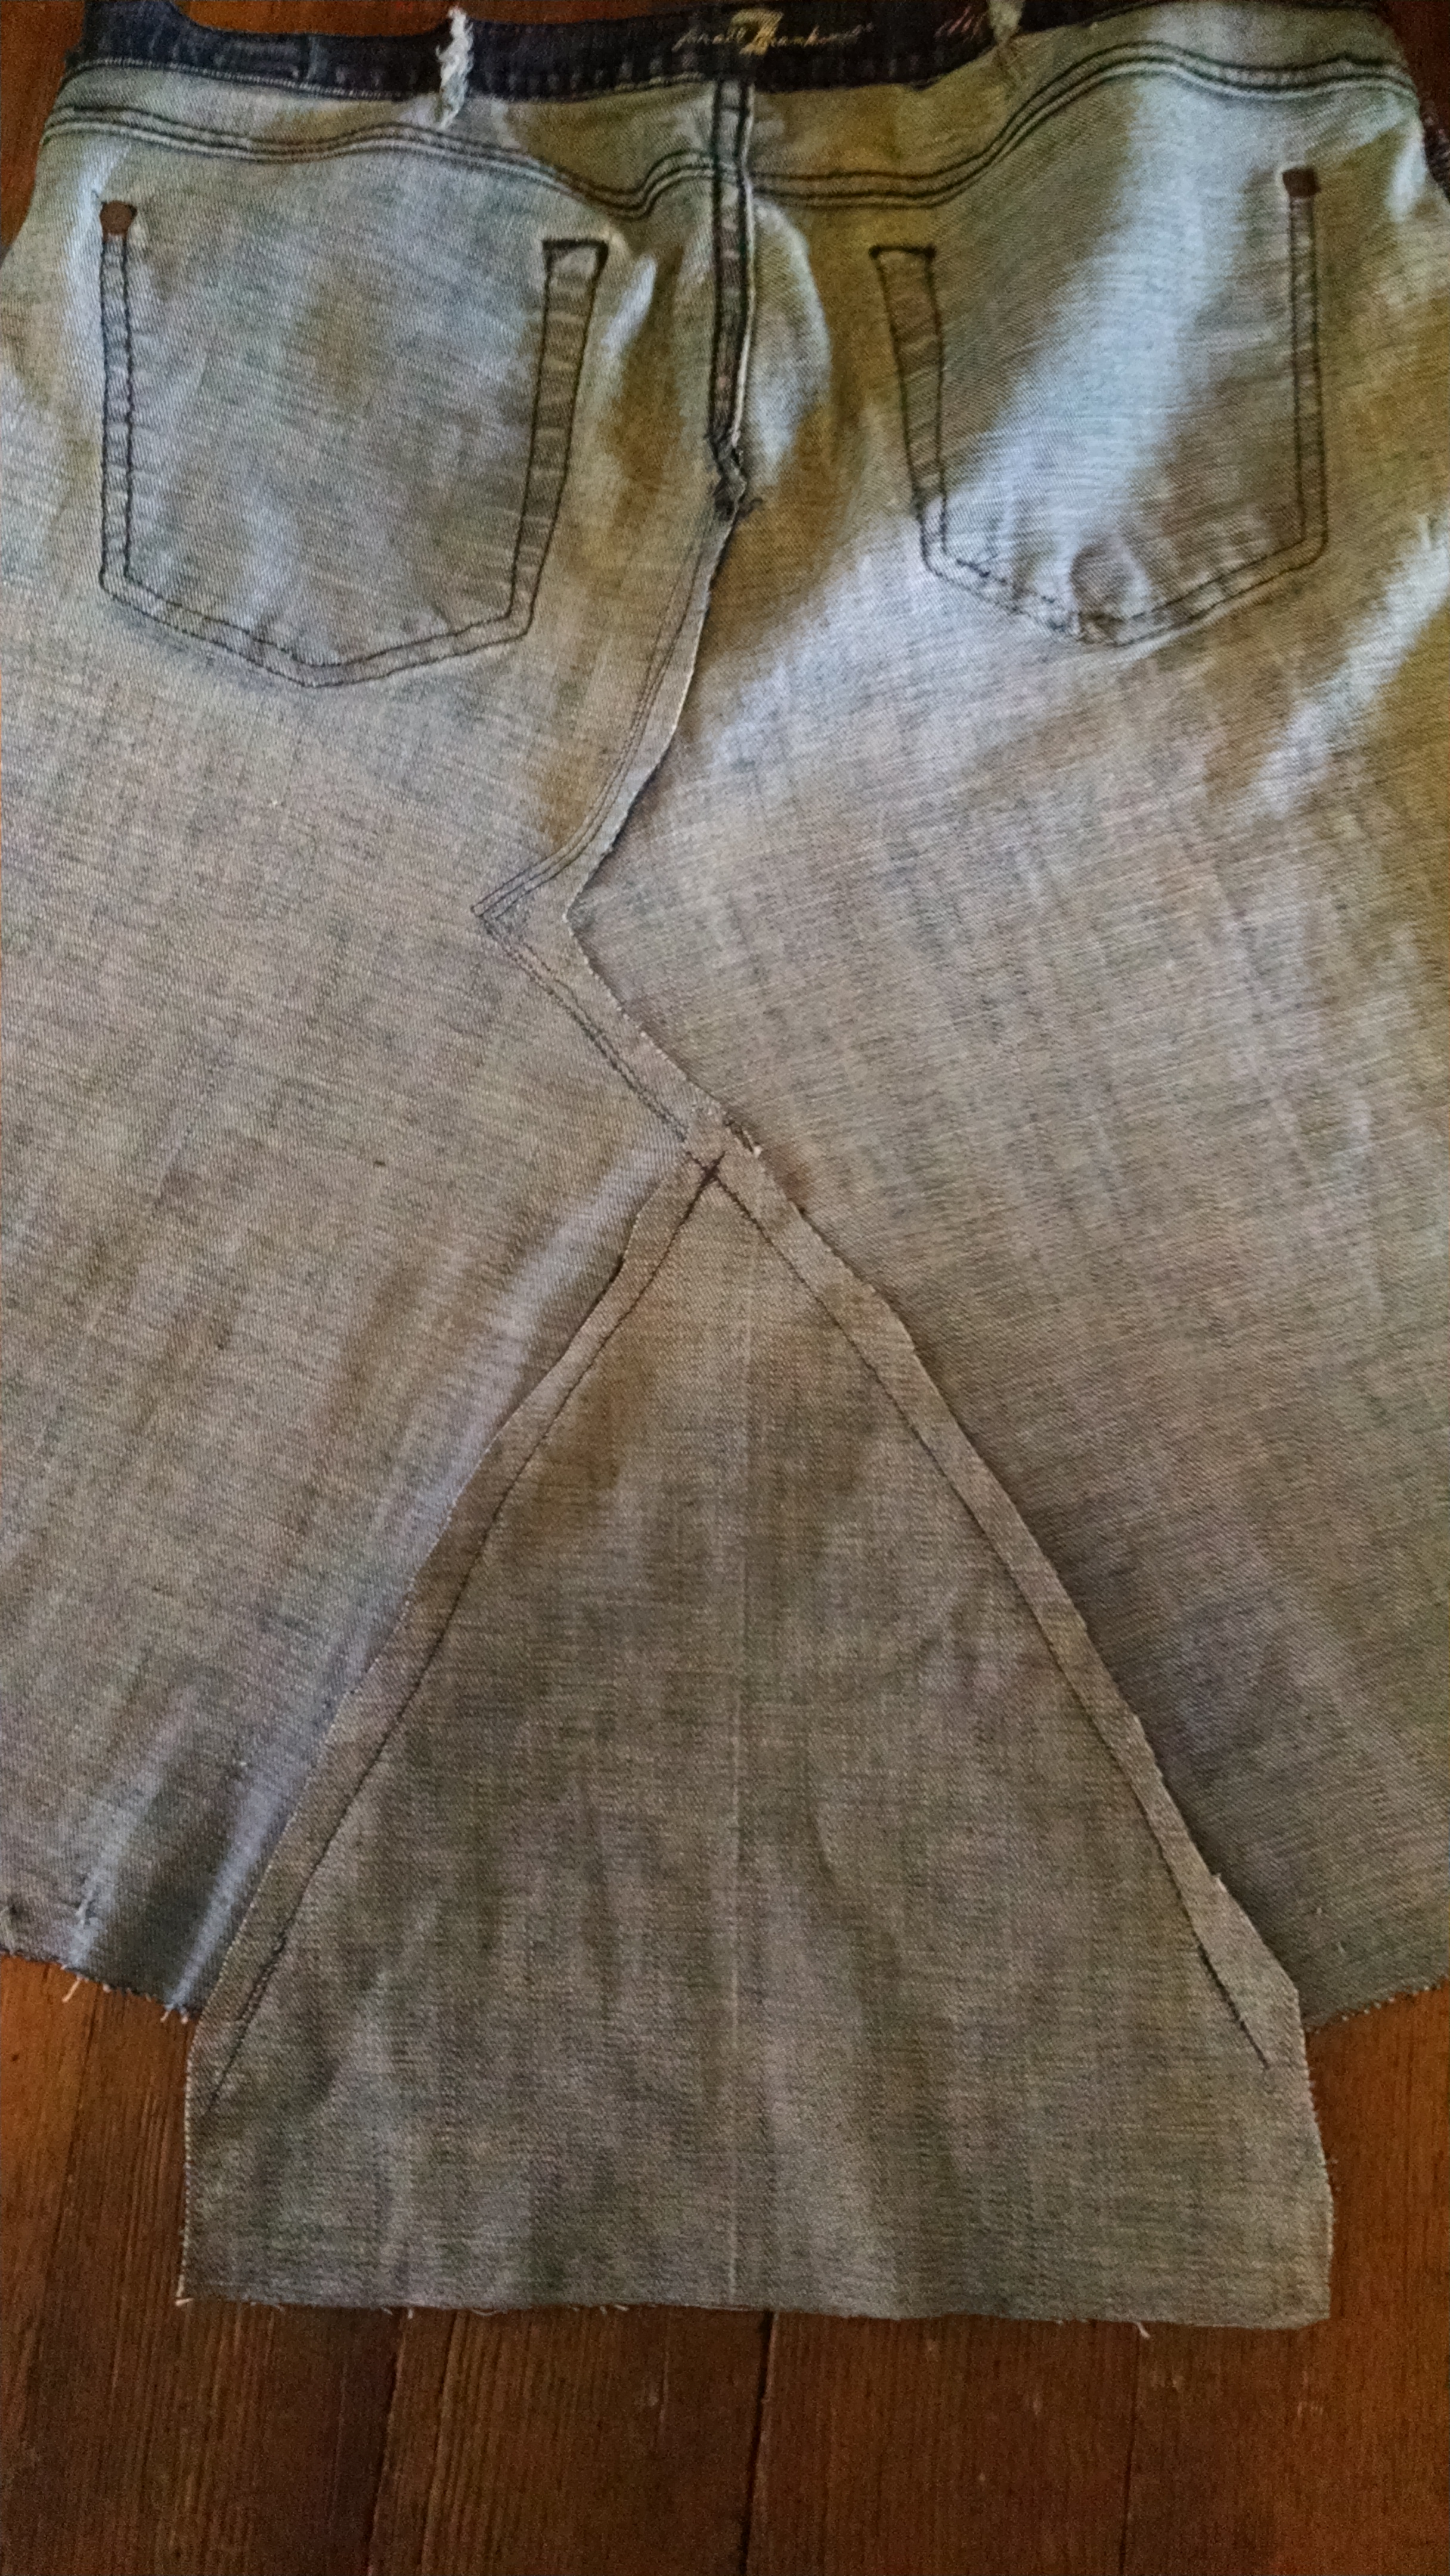
9. Turn inside out and cut out excess (underneath) fabric, both in the front and back. You don’t have to do this, but if you leave the extra fabric there, your skirt will feel heavy and won’t fall as nicely.
10. Keep skirt inside out and retrieve those pants bottoms you chopped off. Lie the skirt flat on the floor and take a look at the triangular open areas in the front and back. Then, using fabric from the bottoms, cut rectangular sections of cloth large enough to cover both triangles and pin them to the inside of the skirt. Leave about an inch of overhang at the bottom, just to be safe. Here’s how the front and back (respectively) should look now. I’m sorry that these pictures are a bit blurry:

11. Turn skirt right side out, try on again to make sure it fits well–without too many bumps–then sew along the triangular seams, front and back.

12. Almost done! Trim off the excess fabric along the new seams you’ve just created. The inside front of your skirt should now look something like this: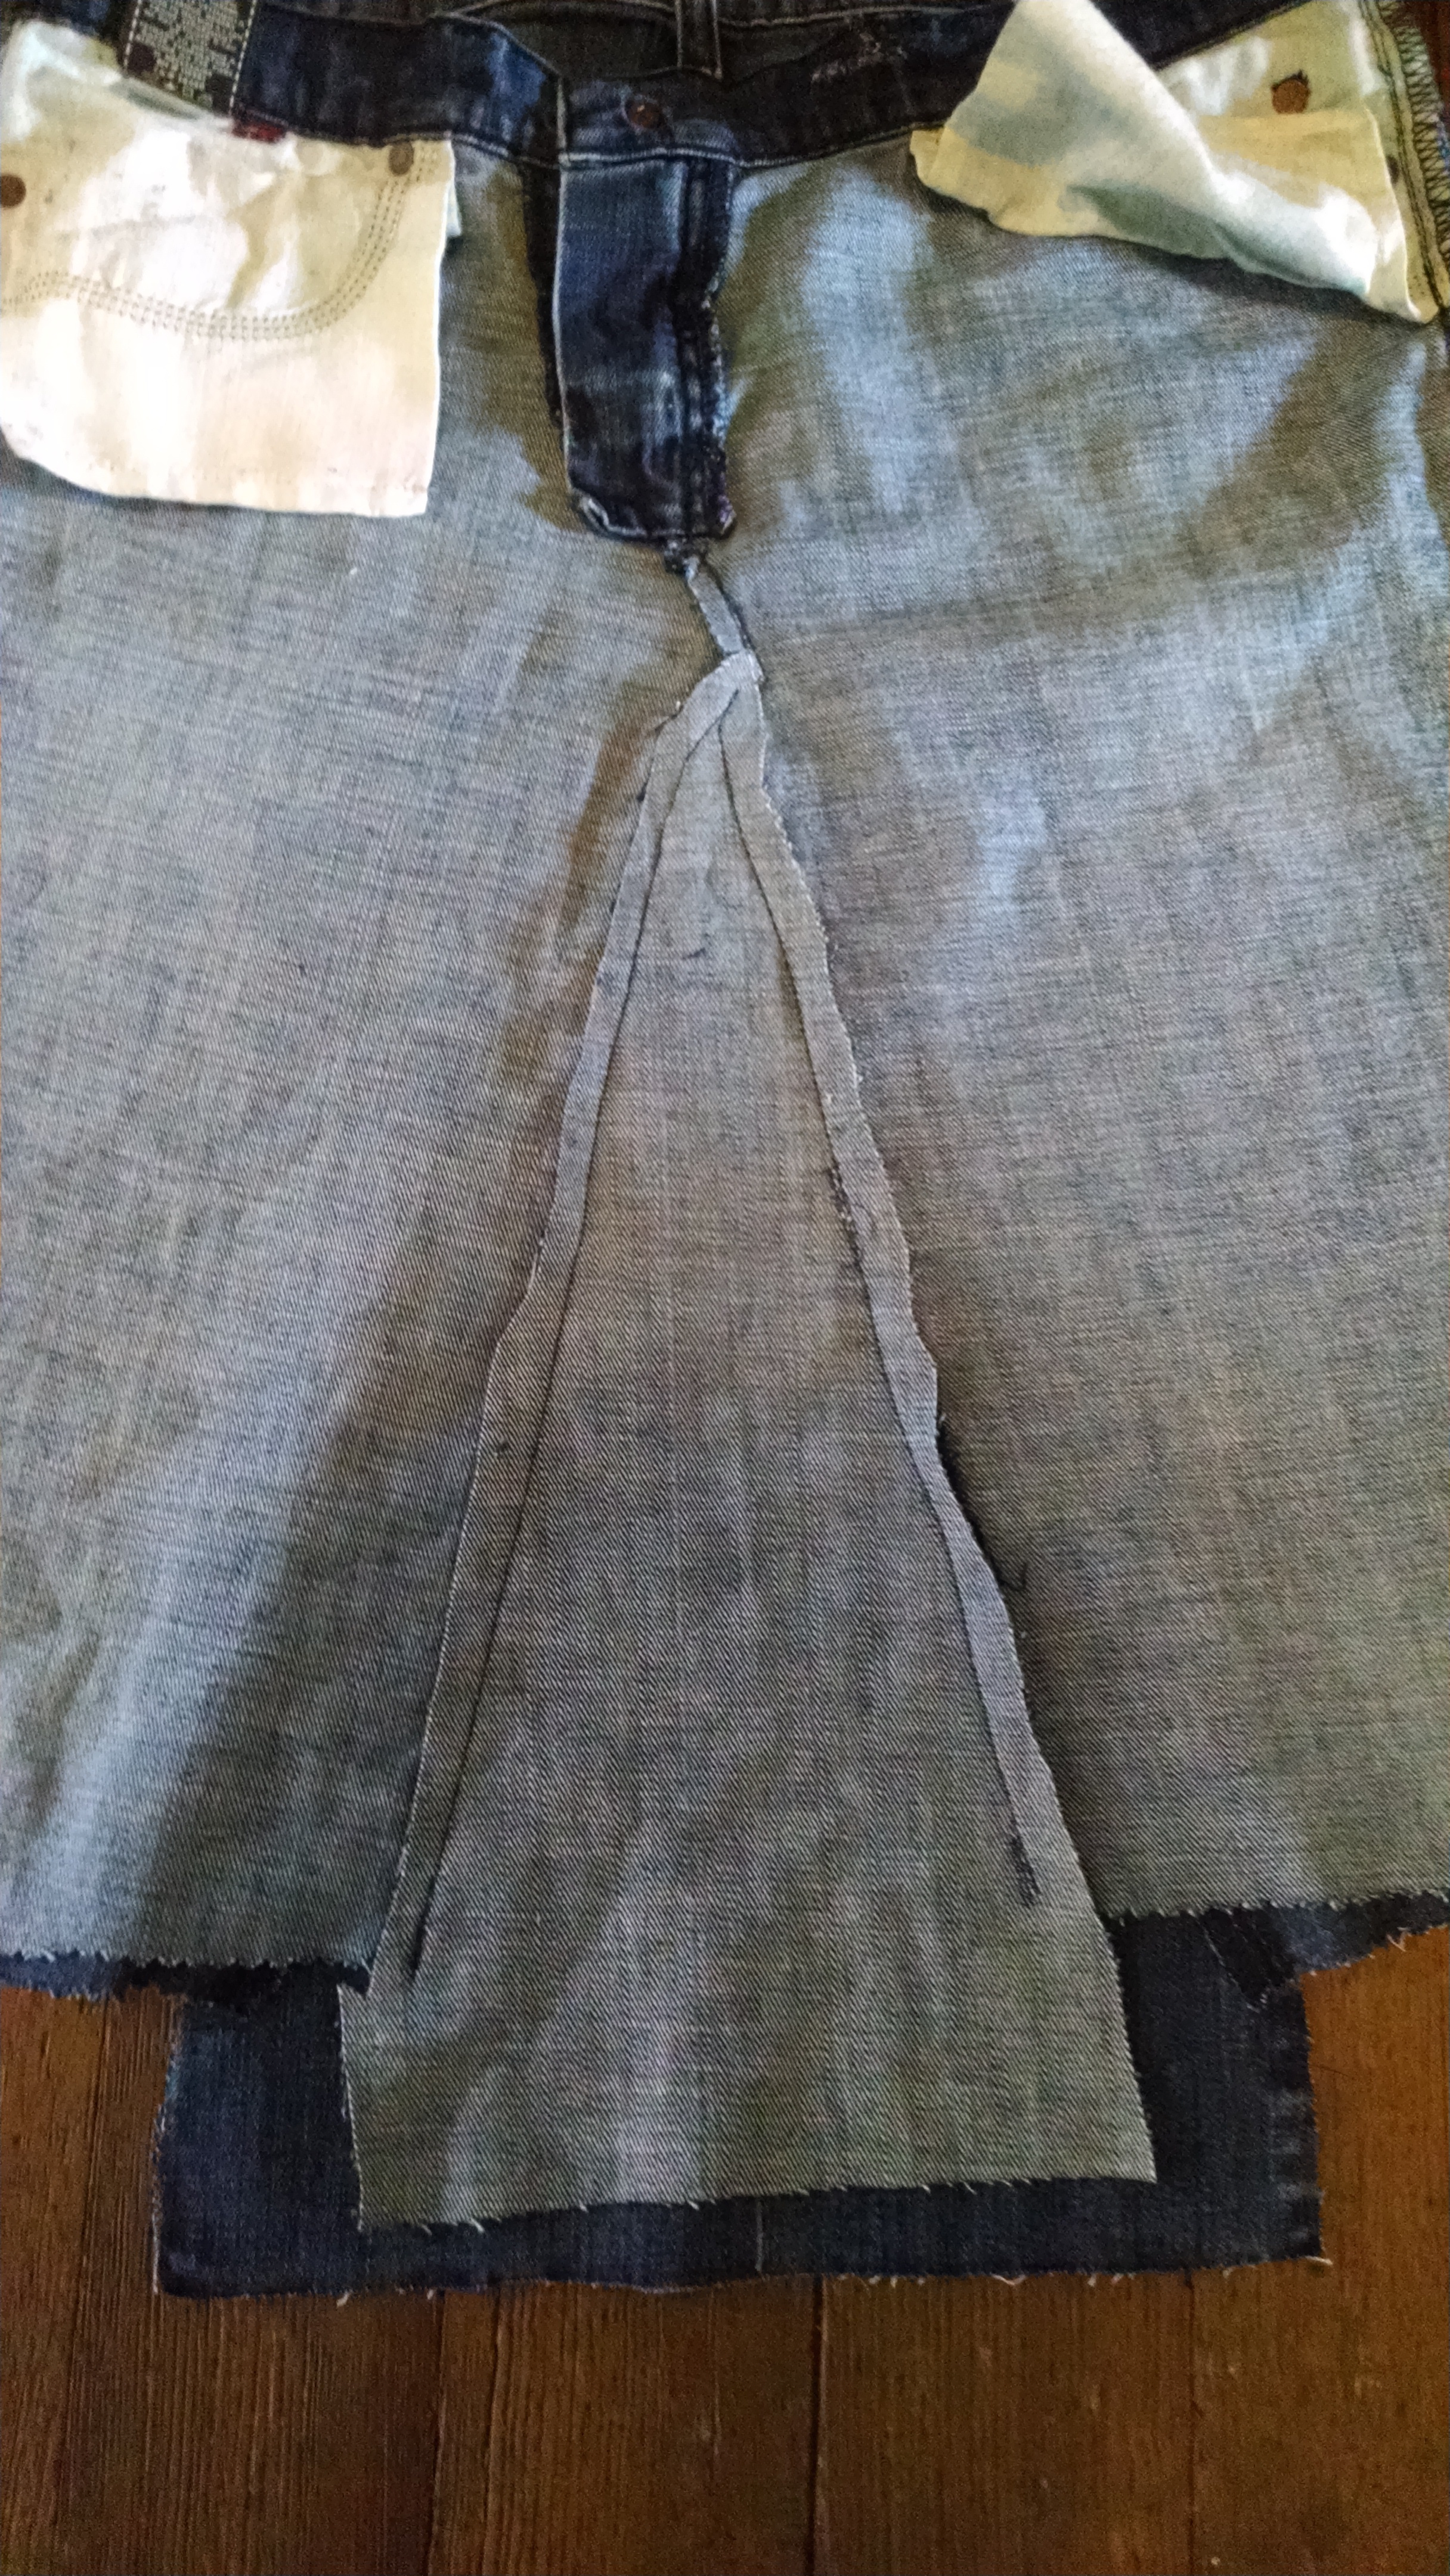
And the back should look like this:
13. OK! Now trim the excess fabric along the bottom, try the skirt on again, mark the length you want, and take it off. Lay it flat, allowing the front waistband to hang a bit lower than the back–as if you’re wearing it–then trim away. If you own a pair of pinking shears, trimming with them will allow the skirt to fray, but not too much. If you use regular scissors, that’s fine too, but you’ll probably have to trim fairly regularly after washing, unless you prefer the look of a really frayed skirt. I’ve found when I make these skirts that sometimes the back is longer than the front when I put it on, but you can easily adjust that with more trimming. 
14. Finally, you will probably have to reinforce the seams at the bottom of your front and back triangles, since you cut the bottom off. So do a few more stitches where necessary, and now you’re done! I like to toss the newly made skirt in the wash and then let it dry–preferably in the dryer–before wearing because that lets the bottom fray a bit and also gets rid of some of the extra threads that might be sticking to it. it should look something like the skirt at the top of this post.
15. Put it on and go on out and enjoy some sunshine. If you love your skirt as much as I love them, you may be making another one soon. And don’t hesitate to ask me any questions. I don’t claim to be an expert, but I have made quite a few of these in my time, so I can probably help if you run into problems.
16. Oh, and if you happen to be looking for a good book to read this summer, please consider checking out Leaving the Beach. But whether you do or not, I hope you enjoy your new skirt!


Cute skirt! But I can’t sew at all. All thumbs!
LikeLike
Aw, I’ll bet you could make this one, Jan!
LikeLike
Denims are one of the best skirts in all the designs.Thumps up to denim skirt!
LikeLike
Thank you, Deepti! I don’t know where I’d be without denim skirts.
LikeLike